Move your domain(s) from CPanel!
If you want to move over from a CPanel server or shared hosting to a server managed by ClusterCS, but don’t know where to begin, you will now find out that it’s relatively simple.
First of all, you need to have a domain added to ClusterCS.
For more information on how to do this, you can check THIS link.
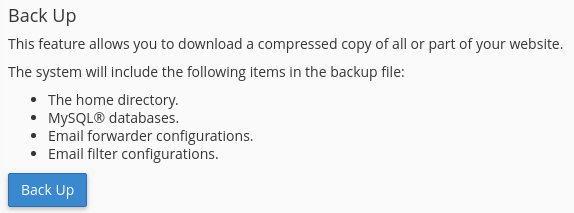
Once you are ready, you will have to do a full backup of your CPanel domain. You can do so using their Backup Wizard:

Creating a full backup will save everything: The home directory, databases and any e-mails associated with your domain:


If you want to save the backup in your PC (If you are not comfortable with using SSH commands) skip to point B.
A. Uploading the backup directly to the server and setting the files using SSH
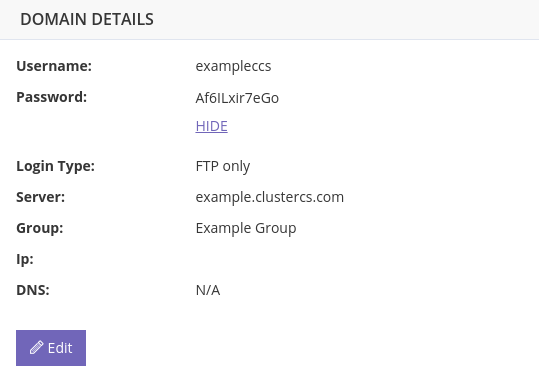
Go to the Manage section of your domain in ClusterCS, when you will find all the data you need.

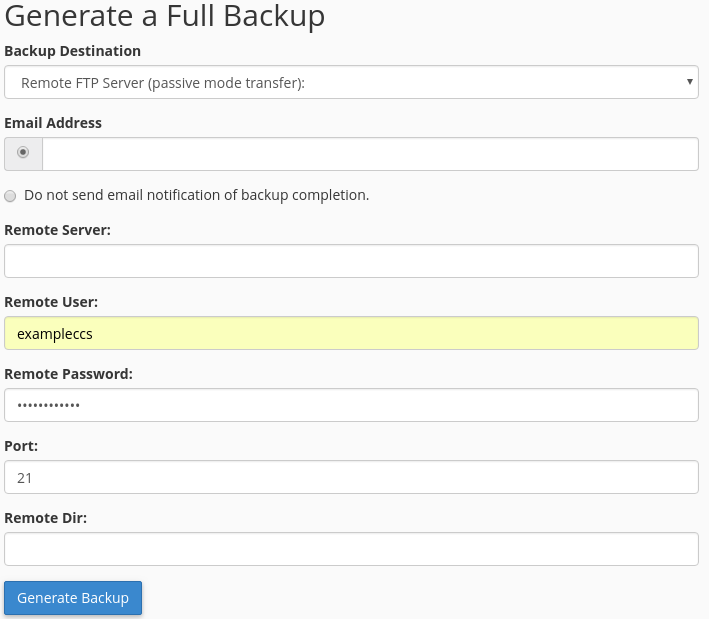
In the CPanel Backup Wizard, you can now select Remote FTP Server (passive mode transfer) to directly upload the backup to the new server. Use port 21 for this, and the Remote Dir option should stay empty:

Now you wait for the backup to be generated and uploaded. Once the procedure is finished, you will get an e-mail (If you chose to be notified), and the backup will appear in your user’s root FTP directory.
Now, to place the files in their respective folders, you need to login to your server using your SSH Client of choice. For most commands, replace the curly braces {} and the text inside them with the names that fit your case.
Then, you need to go to the user’s home folder and unzip the archive:
cd /home/{your username}
tar -xzvf {archive name}
A folder with the same name as the archive has been created, which you can now enter
cd {backup folder name}In case your SSH connection closes, before entering any commands you will need to change the working directory to the backup folder using:
cd /home/{your username}/{backup folder name}If your domain is the main domain added in CPanel, to move the files you can use the following command:
rsync -avz homedir/public_html/ ../public_html/If your domain is added on CPanel as a subdomain or addon domain, go to the respective section in your CPanel and take that domain’s document root folder, which should look like public_html/{folder name}, and use this command on your new server:
rsync -avz homedir/public_html/{folder name} ../public_html/The last thing to do is to set the ownership on the new files, so that the webservers can properly access them:
chown -R {your username}:{your username} ../public_html/Voila! The files are ready to be served, but most websites also use (at least) a database. You can go ahead and create any databases your domain uses in ClusterCS. THIS article should help you if you have any trouble.
Keep the SSH connection open.
If you know the database user(s) password(s), you can add them exactly as they are in CPanel “MySQL Databases” tab. Remember to Associate the user(s) to the database(s).
Now we only need to restore the database(s) from the Full Backup created. They are all located in the mysql folder. Use this command once for every database you need to restore:
mysql -u {database username} -p {database name} < {database name}.sql
Now your domain should be fully working!
If you want to transfer e-mails as well, see C.
B. Saving and uploading the backup from your PC
If you aren’t familiar with secure shell (SSH) commands, then you also can upload the backup using FTP/phpMyAdmin. Please do keep in mind that phpMyAdmin is not a good solution for large databases.
Instead of choosing a Remote FTP server, you can choose to save the backup to the home folder of your domain in CPanel. Once it is done, you can download there from their File Manager or using any FTP client.
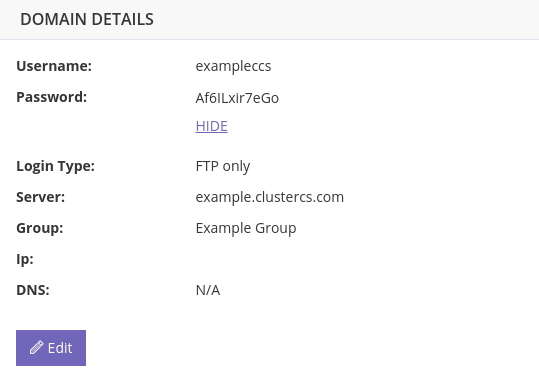
Once you have the backup, you should unzip it on your PC, enter the newly created folder, and connect to FTP using the credentials in the Manage tab of your domain on ClusterCS. Should look something like this:

From the newly created backup folder on your PC, you should navigate to homedir/public_html and copy all the content of that folder to the public_html folder on your domain.
As for the database, first create the database(s) you were using. After setting the username(s) and database(s) and associating them, you can connect using phpMyAdmin:

From here, click on your database, import and select the .sql file from the backup folder/mysql/

NOTE: If you get any errors related to collation, edit the SQL file and use the Search and Replace function of your Text Editor to replace any utf8mb4 occurences to utf8.
C. Moving e-mails from CPanel to ClusterCS:
Check this guide to add the e-mail addresses to ClusterCS before migrating anything you have on CPanel:
If you used method A: Connect using SSH to your VPS. Use the following commands to move the mails folder to the right place (Replace {your domain name} with the folder bearing your domain’s name):
cd /home/{your username}
rsync -avz {backup directory}/homedir/mail/{your domain name} /var/mails/         - Make sure there are no slashes after {your domain name}
chown -R mails. /var/mails/{your domain name}
If you used method B: Enter the backup folder on your local PC and upload using any FTP client the homedir/mail/{your domain} folder to the user’s home folder on your VPS.
Connect using SSH to your VPS. Use the following commands to move the mails folder to the right place (Replace {your domain name} with the folder bearing your domain’s name):
cd /home/{your username}
rsync -avz {your domain name} /var/mails/         (Make sure there is no slash after your domain name)
chown -R mails. /var/mails/{your domain name}
